AuthoredUp doesn't have its own scheduling system.
Our application exposes LinkedIn's native scheduling feature within its editor. As a result, we don't have direct control over what happens after you click the clock button to schedule a post.
To use LinkedIn scheduling, you need to have the feature enabled by LinkedIn. The availability of this functionality depends on LinkedIn's discretion.
If you have a scheduling feature, you'll see it in LinkedIn's native editor, as well as AuthoredUp's editor.
To schedule a post via AuthoredUp, ensure that you're in blue mode.
Now, follow these steps to schedule your LinkedIn post:
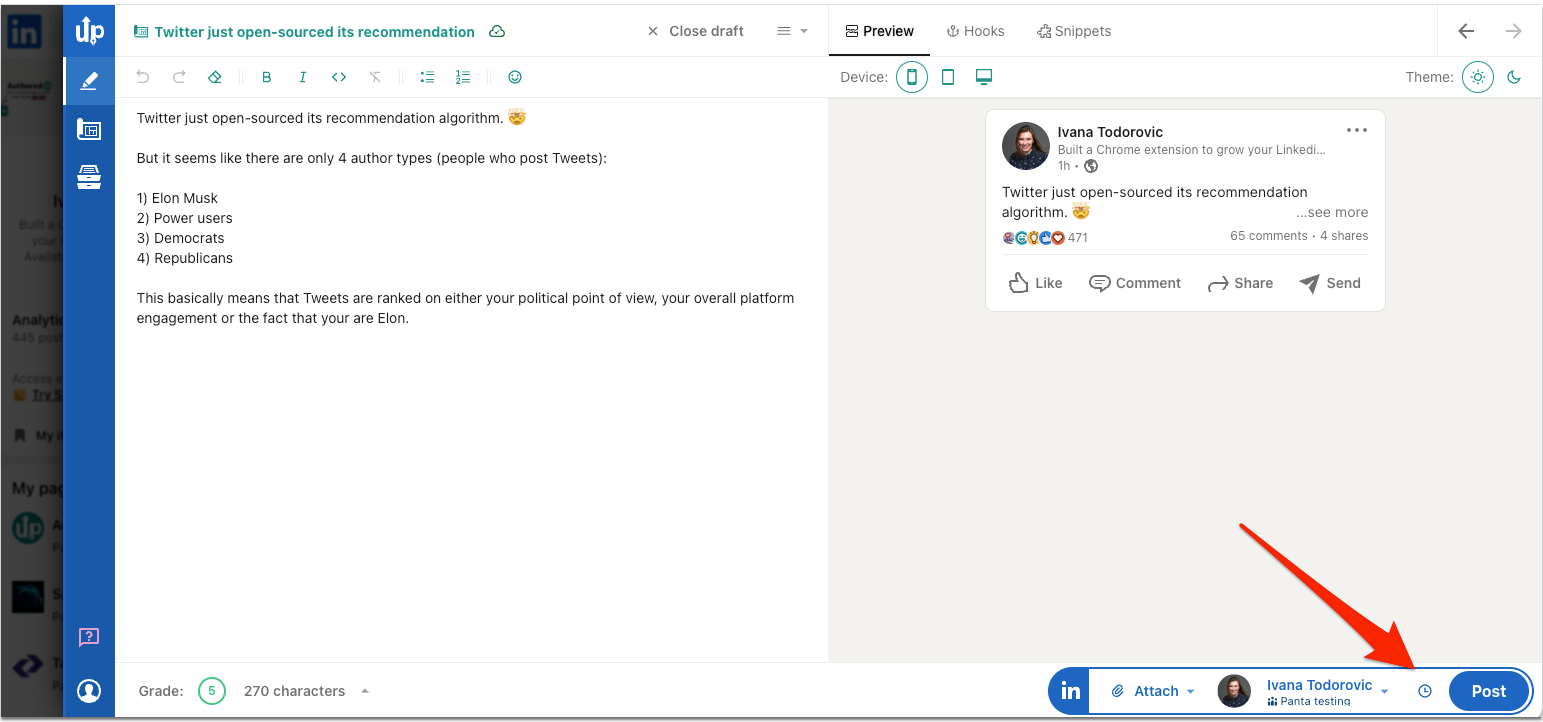
- Write your post in AuthoredUp.
- Click on the schedule button (the clock icon).
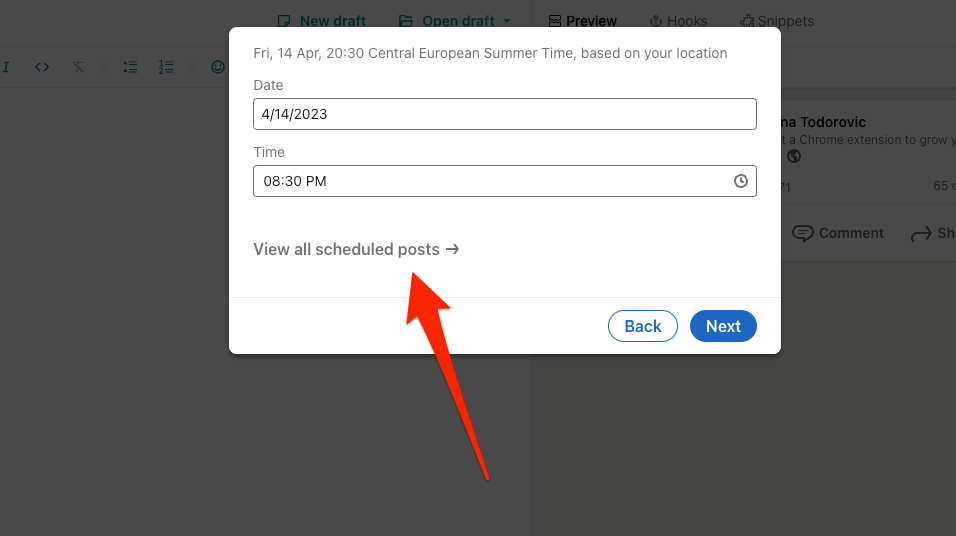
3. Choose the desired time and date for your post. You can schedule a post a minimum of 30 minutes in advance. Note that not all types of posts (attachments) can be scheduled.
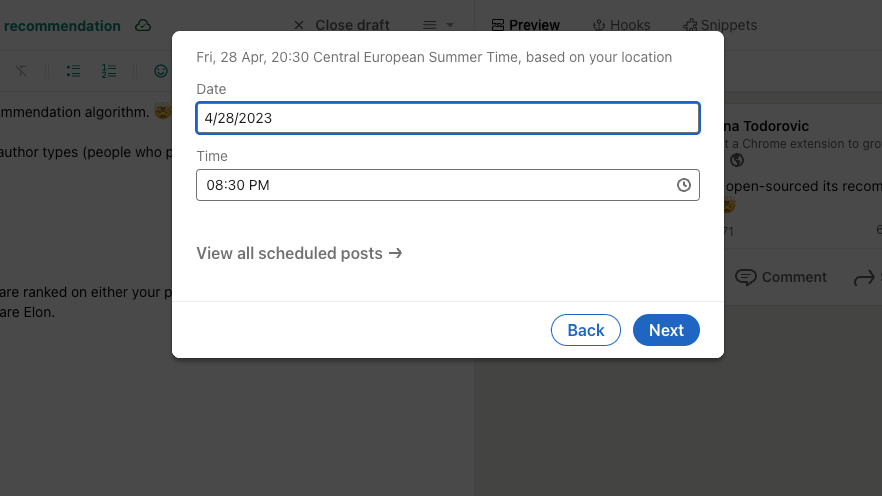
4. Click Next
You'll return to the editor, where the post button will change from Post to Schedule. You'll also see a countdown to when your post will be published (e.g., in 14 minutes).
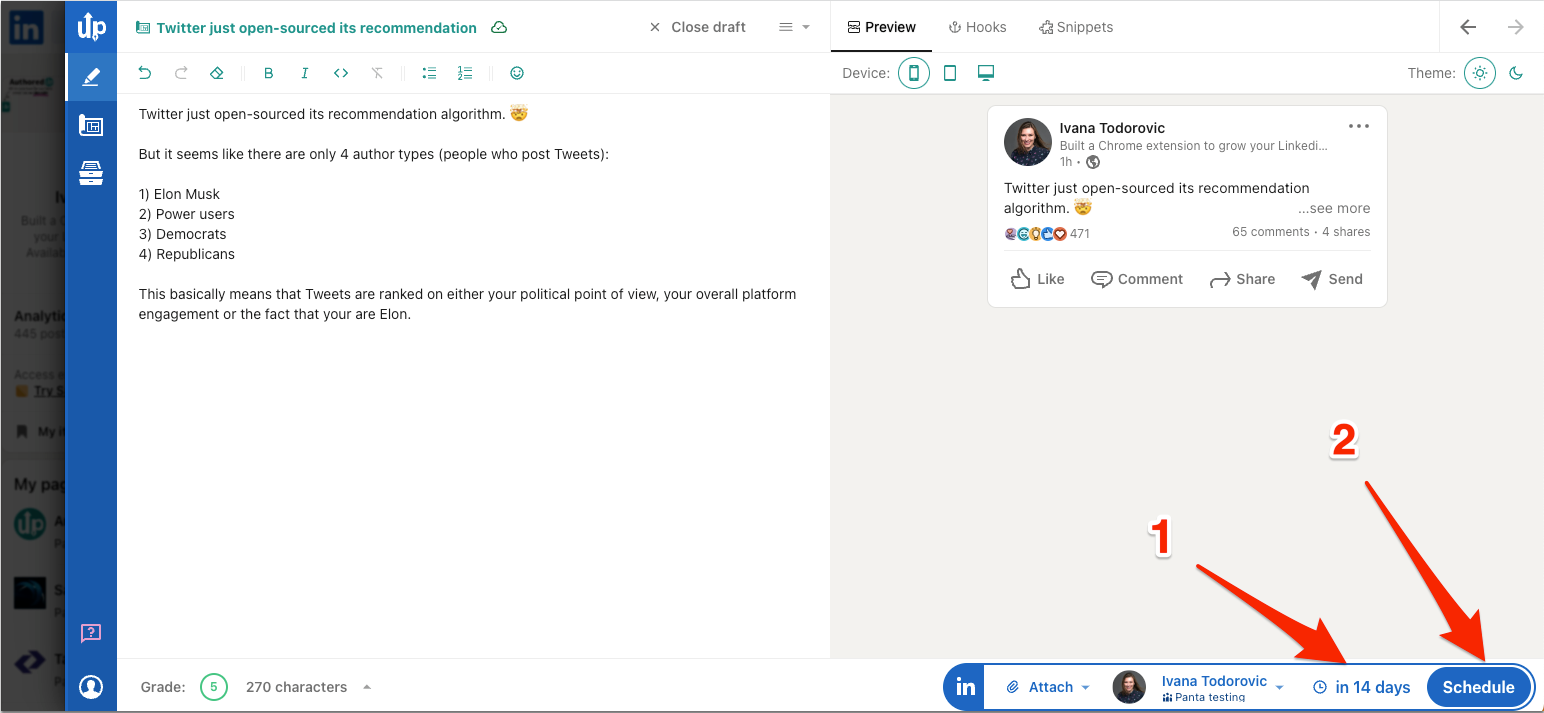
5. Click Schedule. AuthoredUp will close, and your post will be scheduled on LinkedIn.
How to see your scheduled posts?
- Open AuthoredUp in blue mode.
- Click on the Schedule button
- Click on "View all scheduled posts"
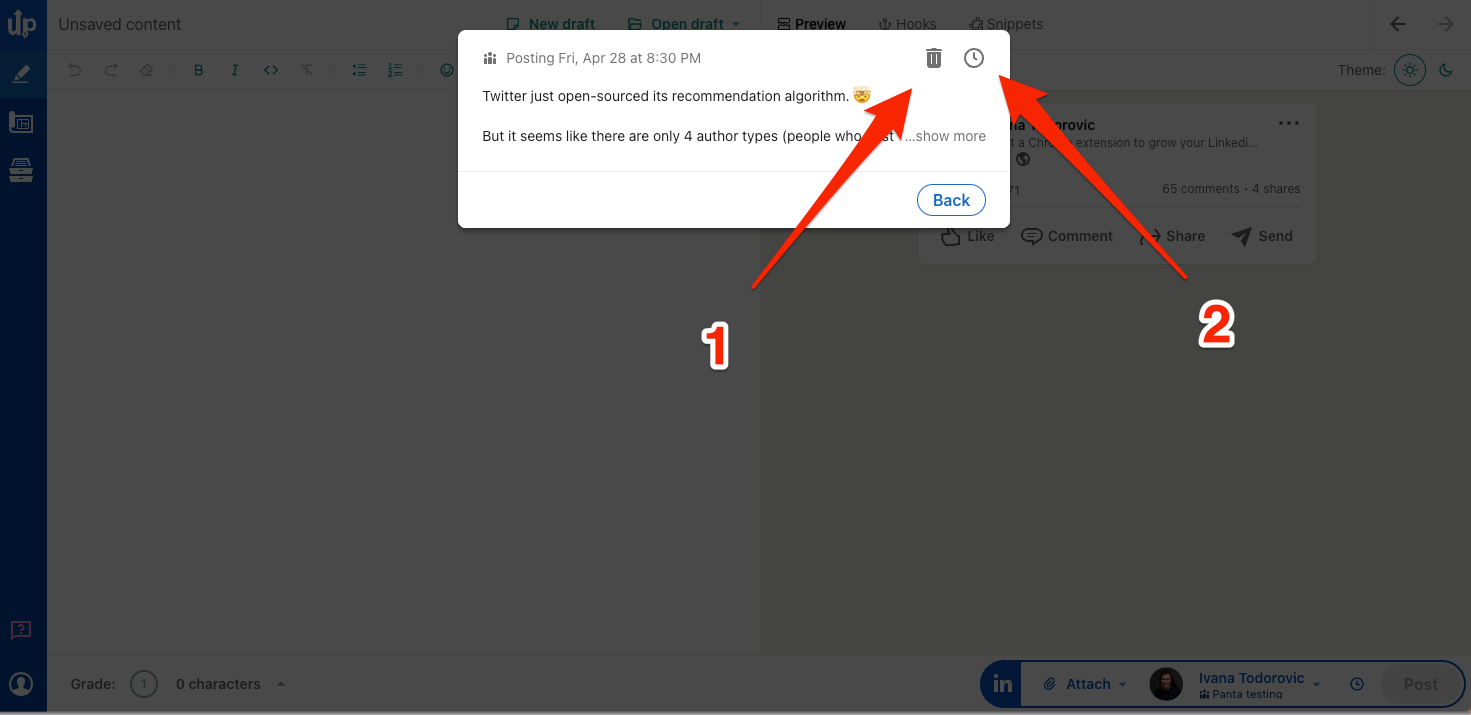
- You'll see all your scheduled posts in the modal. From there, you can delete post (1) or reschedule post (2). Note that you cannot edit the post, so make sure always to schedule posts that you saved as drafts.